This week at 14-10 hrs Thursday, Dave finished the drip strip over the side doors which completed the steelwork contract and we will now both work full time on the fit out.
There are still some minor steelwork extras like the lamp mast and some roof box work to be done as part of the fit out but the steelwork is substantially complete.
It looks excellent and I am pleased with it.
As of Friday evening we have the 12V wiring looms for each side loosely in place and the boarding out of the cabin continues.
The hull side (gunnel to floor) boarding has been carried through the back cabin on the starboard side and Dave has made start on the roof boarding.
Saturday, 26 May 2012
Back cabin lining

After completion of the steelwork Dave went stright onto fitting the roof boards as shown below whilst I continued fitting the hull side boards from the engine room (where the previously fitted boards are painted white) through the back cabin.
This entailed loosely mounting the wiring loom as shown and threading downwardly routed wiring behind the boards and flooring.
- This inevitably ensured a bit more insulation removal - and resultant mess to clean up, hence the vacuum cleaner at close hand.
Dave fitted the roof boards, aligned to his tight centre line stretched right through the boat from front to back hatch centres. Cut outs for the back cabin ventilator and roof light can be seen. Given the careful alignment, centre cut outs and establishment of where joints in the boards can be best placed the first few boards are more tricky and time consuming.

Although two of us working simultaneously in the confines of the back cabin sometimes made things a bit tight an unexpected bonus was the covenient help in passing tools and providing an immediate third hand where required.
Doors - including hot rivetting


Even on wooden boats it was common practice to have metal doors on the sides and engine room. Because of the tumblehome (slope) on the cabin side a cover strip was rivetted on to stop the ingress of water though the central gap.
Dave has produced this in the traditional manner by hot rivetting the strip in place.
In the top photo the rivet is being heated and in the second it is being hammered over. The rivetting is a nice functional but decorative feature.
We found that we could work efficiently if I heated the rivet then removed the torch then Dave could immediately peen the rivet.
Although noisy I enjoyed this job mainly as it was a holiday from trimming insulation.
The photo below shows the doors in place.
Shown also are the sturdy hinges (with bronze pins to resist seizure) and the drip strip over the door.

To stop water getting in at the side of the doors this strip is welded along the rebate.
The photo is taken looking vertically downwards on the edge of the engine room door.

Wiring harness installation

Above is the post wiring loom as delivered.
The wiring looms are supplied with a schematic diagram. When unfurled and laid out in the boat the junctions, branches and wiring (which is colour coded) can be identified and the loom may be loosely put in position.
The photos below show the start of this process.


Insulation cut back around stove pipes and exhaust
Although it was well and evenly applied I have spent quite some time trimming back insulation so as to leave the maximum thickness whilst still being able to fit the lining as closely to the steel as possible. It is a tedious job to do properly. Some builders specify thin foam and others "loose" or waste internal space to avoid this job.
Here it has been accomplished with a straight edge between the knees/ cross members then cutting and rasping away the excess . The waste "crumbs" and dust produced in massive quantities stick to everything including vertical surfaces and get everywhere. I am glad to see the end of that job.
- That's if we don't find any more overlooked high spots.
To meet fire regulations the insulation has been completely cut away 60mm away from the saloon and back cabin stove pipes, the exhaust and the Kabola CH flue as shown below. Rockwool insulation will be filled into these annuli.


Completed bow steelwork

Here is the now completed bow which was almost finished last week. The T stud is welded in at the top of the breast block and at deck level a couple of inches lower.

Saturday, 19 May 2012
Summary of work to 18th May
Another productive week following the usual format of Dave getting me started on the interior fitting out tasks whilst he mainly concentrated on the steelwork which is very close to completion.
Completion of the bow steelwork (except T stud installation) has really brought the character of the shell to life. The work put into the deck lids, hinges and stem iron etc shows attention to detail and craftsmanship which easily justifies the cost.
On Friday night when we "knocked off" the area was strewn with tools etc and the light was bad but I shall take and add some photos as soon as possible.
T stud

When fitted in the hull next week it will be heated to red hot and the ends curved over.

Bow steelwork detail

Here Dave has welded up and dressed off the front cants. As an example of attention to detail he is completing the last stage of removing marks with a small file (!)

The photos above and below show the making of the last portion of the stem iron froma piece of D section bar which is cut, split and separated whilst red hot before filling in to give the fish tail shape seen on some old stem irons of wooden boats.

Here at the top centre of the photo the "fish tail" end has been welded onto the back of the stem iron and dressed off to a gentle curved profile to be completed with a single "spike head" . The T stud lying alongside the gas locker lid will be installed next week.


Hull lining, cable carriers and battery box
In the photos below the T and G hull cladding has been primer painted.


This photo shows the 240V ring main artic cable installed in it's wooden carrier clips which will also serve as mountings for the bottom capping of the under gunnel duct.
Cable ties have been installed to carry the 12V wiring loom.


Here the battery box is shown in position alongside the engine at the starboard side, back of the engine room which puts it conveniently close to the inverter and starter motor thus keeping heavy current cable runs short. The box is of 4mm steel and will carry the 4 domestic and 1 engine start battery. The lid will be sealed onto the flanged top edge of the box so hydrogen will be vented from a pipe connecting the tapping (which can just be seen below the hanging blue cable) to the roof outlet. The cables will exit the box through the rectangular hole at the back.
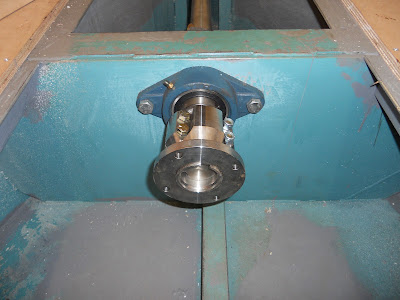
Rudder and stern gear
By the time I arrived at shed (from Derby) at 10-30 on Monday morning Dave had already fitted the prop and stern gear.

Here is the stern tube and stuffing box/gland with the grease injection port.
As a temporary measure a standard grease nipple was fitted which allowed the shaft to be lubricated after the gland packing had been fitted in the stuffing box. Grease was injected until it could be seen at the outside hull end of the shaft whilst it was rotated by hand. In due course a stern tube grease dispenser mounted in a convenient place with grease injection line will be fitted.
At the bottom left of the photo a (plugged) valve which will allow convenient drain down of the skin cooling tank from it's lowest point can be seen

At the inboard end of the porp shaft a bearing provides support.
The coupling to the cardan shaft is at this stage loose on the prop shaft.


Here the rudder has now been welded on. The skeg strengthening bar is made of two pieces of D bar welded back to back to give a smoother "lense" cross section.

At the top of the rudder there is some rivet detail and a hole to attach a rope which will make rudder removal more convenient.
Sunday, 13 May 2012
Build slot available Jan 2013
The forward programme for completion of my boat and a subsequent boat "stretching" project takes Dave's work through to early 2013. If this timing suits you and you would like a similar boat, or indeed any other type of boat built, modified or fitted out please contact Dave via myself or directly on 01952 881141 or 07950 097788.
Summary of week to 11th May
As described in the previous eight posts we have accomplished plenty this week. I have been doing the woodwork as per Dave's initial instructions on how to do each task whilst, after getting me started on each section, he has been mainly concentrating on the steel detail. This has worked well because Dave has built over forty boats and his experience and planning has proved valuable in having all tasks planned and materials ready in time. We have had no delays for designing, corrective work or material deliveries.
The result of this is that I am fully employed, averaging about 11-12 hours a day - often ending in the evening with the menial jobs like sanding, cleaning and painting. ie the jobs that Dave's skills are wasted on.
The payback for this that I am getting some top class boat fitting lessons, know my own boat intimately and there will be a significant cost saving on the project.
Saturday, 12 May 2012
Squirrel stove feet upgrade

To allow this Dave has fabricated small legs which bolt behind supplied stove legs. These have feet drilled for bolting (through the hearth) to the steel hearth base.
Roof hatches

Two roof hatches with lights will be installed over the galley and saloon.
These have been made in the style of wooden deck lids, once again with grooving to replicate planking.
They will be mounted on sturdy hinges similar to the deck hatch which they match.
Bathroom wall

Panelling the hull sides

This shows how the T and G planks form the hull side panels spanning the floor batten to the underside of the gunnel.

A pull through wire has been installed to allow easy installation of the toilet wiring and the cut out for the galley sink pipe can be seen beyond.
The area behind the stove has been missed as this will be covered by fireboard and tiles.
Water tank and under the tug deck

Here is the sub floor laid under the tug deck with the water tank at the bow end.
The area is to be used for storage but could easily contain a decent sized bed.
Lining under the gunnel with cable carrier etc

To line the hull under the gunnel, support the cabin and hull side linings and carry the wiring this plywood section was constructed and fitted in 8 foot lenghths.

Here it is screwed up against the gunnel underside and knees which have had a small amount of insulation removed.
The cabin side end is affixed to the batten and the outer side is affixed to the knee with self tapping screws.

Once installed a wooden straight edge is held from the batten along the floor edge (which will carry the hull side panelling) to the top underside edge (which will carry the to ends of the hull side panneling) and the excess insulation is carefully cut and rasped back to give clearance for the panelling. This is to leave maximum insulation but still allow the panels to be fitted.
Bow ballast

The pink painted plywood sheet will carry the water tank.
SpongeBob squaretank

As mentioned in an earlier post a diesel tank to supply the Kabola central heating boiler will be installed under the back cabin side bed in the space against the tapering hull side (the swim). Dave has fabricated a tank shaped to fit as shown above.
I think it has amusingly turned out looking like an animal with it's four legs and slightly surprised "face" with eyes and mouth (formed by the fill, breather and delivery tappings respectively) on the narrow end. I have therefore decided to call him Bob the Tank.

Here is Bob viewed from above more or less where he will be sited but yet to be painted.

Edit added on 28 May.
Here is Bob resplendent in his coat of gloss paint.
The colour is grass green - like his friend battery box.
Sunday, 6 May 2012
Summary of week to 4th May
The boat has been transformed this week by addition of the foam insulation and floor. Suddenly it is much lighter and warmer inside.
On Monday the wiring loom was delivered and on Wednesday the plywood, ordered on Tuesday, for the line out was delivered on time.
The 19mm WBP exterior ply for the floor is very good. It is so hard it needs much more pilot drilling and countersinking for the screws than expected but on balance that is a price worth paying.
Two of the sheets have such a pleasant grain that they will be used under the tug deck without the oak floor planking. This will save a few quid ( I am from Yorkshire ) and give marginally more headroom.
Laying the floor means one can actually walk about without the risk of tripping over knees. - Luxury.
Saturday, 5 May 2012
Water tank support
The water tank will be fitted at the front under the tug deck immediately behind the gas locker. Here Dave has added extra steel to support the tank on it's wooden base (bottom photo).
The grey primer has been applied here to the new steel and scratched areas of the keelson and floor.


Ballast, sub floor and stove hearth installation
The first job after sprayfoaming and before laying the floor was to position the cabin stove and install the steel hearth base. Here is the squirrel stove on it's base made of 1/2" baseplate offcut. The stern end reached a convenient knee and the fore end can be seen supported on a steel angle welded in to fit. A tab at the hearth front was added to support the sub floor as was the plate to the stern end beyond the knee.
Ballast in the form of conveniently sized drive paving bricks was packed below the hearth. Being very cost aware, Dave had "rescued" these from a waste skip.

Here the back cabin side floor sections have been added. Below these the fuel tank has been insulated. The foam on the back face can just be seen after cutting back.

The busy scene on the photo below shows the various stages of ballasting:
1 Cleaned thoroughly with a vacuum cleaner to ensure no remaining debris.
Scuppers cleaned and edges/scratches given another coat of paint.
2 Roofing felt fitted to within 1" of the edge of each compartment is laid. This protects the baseplate against scratching and eventually "melts" to fix the ballast in place. The bare edge allows contingent water movement.
3 Ballast in the form of paving slabs is laid to as closely as possible, but with the edges clear, fill the compartment.
In this case the long thin rear slab was found to be bevelled so this was laid along the bottom rear edge.
Following ballasting the sub floor is installed.
The sub floor is 19mm hardwood ply shaped to fit around each knee and fastened to the base knees with self tapping screws about 8 to 10 inches apart. Where possible joints were made on the knees which are 8 feet apart. Where a joint did not occur over a knee (ie longitudonally or where a pipe crossing was built) a bridging piece was added to ensure stabilty and level.
Even though an oak planked floor will be laid above it in most places each section was carefully checked for level to it's neighbour to ensure no ridges.
The hearth steel support has now been painted but the hearth itself has been left to give the tile cement best chance to stick.

Sprayfoam insulation

The sprayfoamers were booked for 8-30 on 1 May and they turned up at 8-25 which was a good start. To get the hoses to reach from the van to the boat the van had to be reversed into the end door of the shed which was a bundle of fun as the van had to be reversed and turned 90 degrees on a narrow road to enter the shed with about 2 inches of clearance either side. This took a few attempts by the (sweating) driver whilst his mate (amongst others) shouted instructions and encouragement, banged on the van and placated the queue of school traffic (ho ho).
After a quick reccy, some masking up, the hoses were coupled up and pumping equipment energised.
The photo above shows the operator in breathing gear applying the foam.
Whilst this was going on Dave and myself were modifying and drilling the door hinges.

After the excess foam and masking tape had been removed (see bottom photo), the apertures were cut out to reveal the thickness of foam on the hull. Below are photos of a porthole and roof prism cut-out respectively.


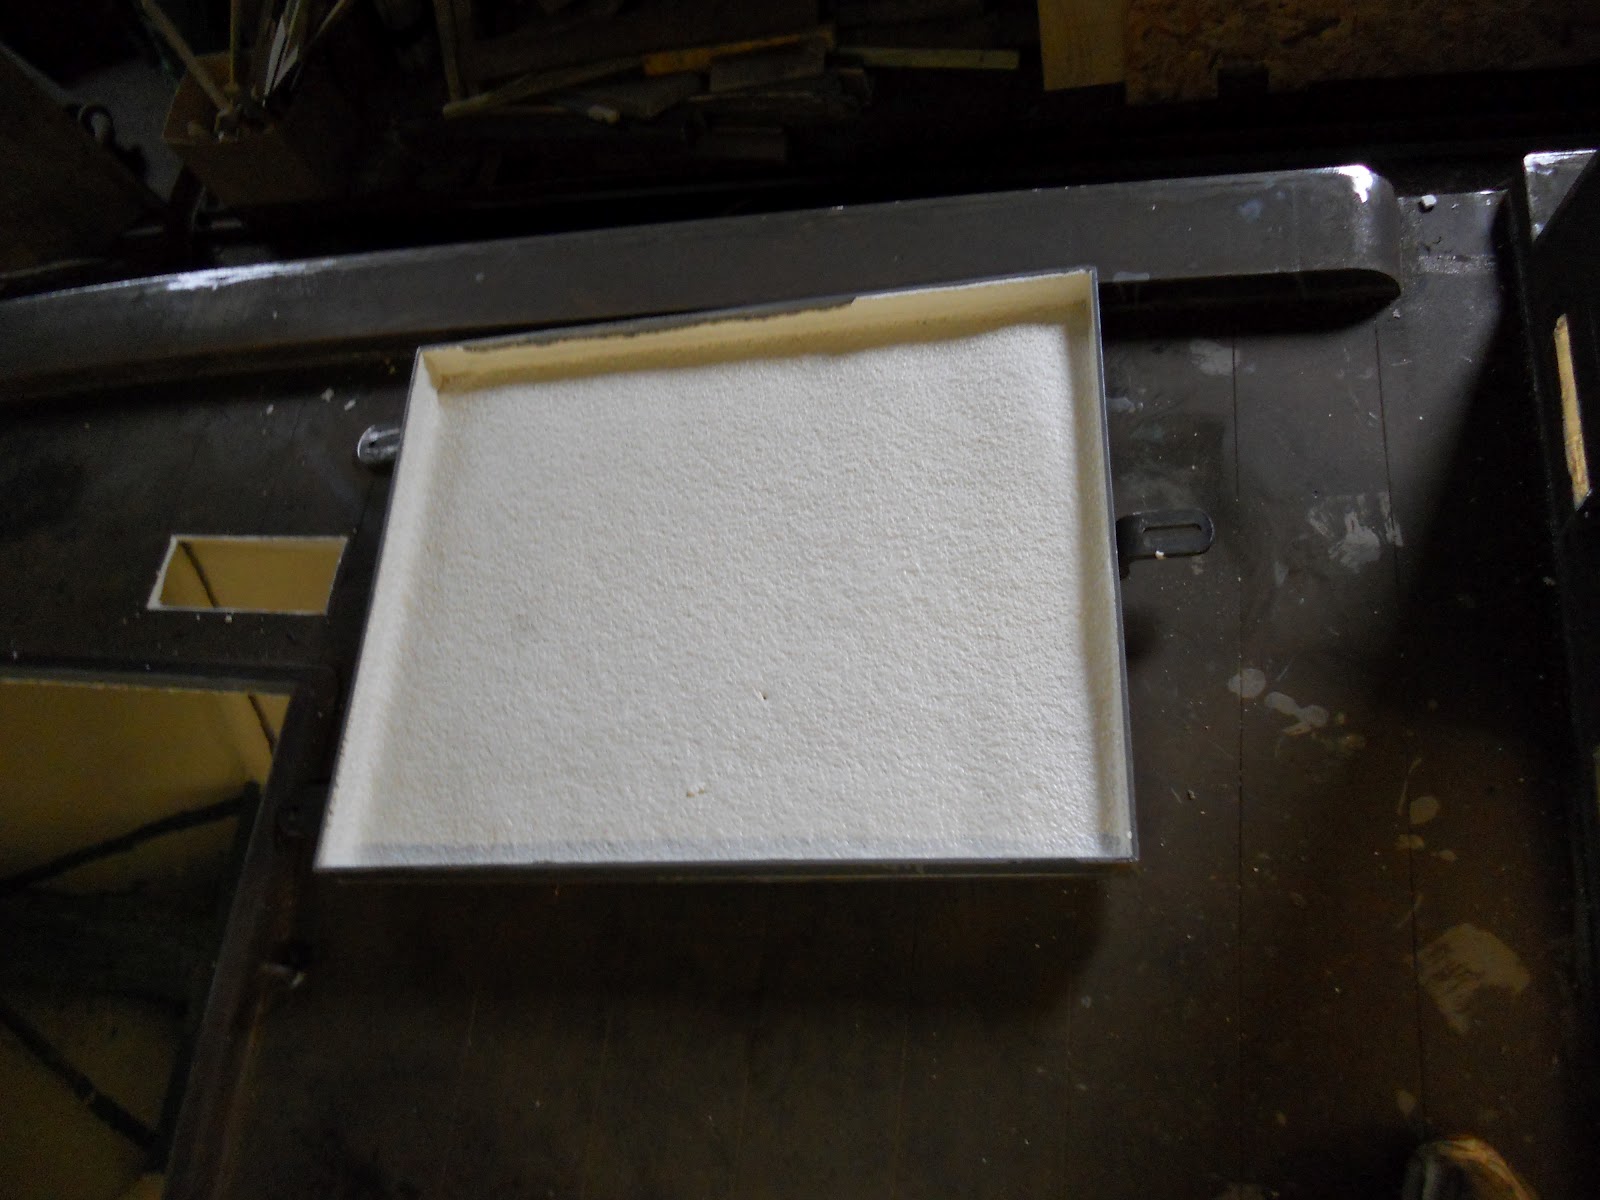

To reduce condensation on it's cold surface and act as a noise barrier the water tank was also insulated. Here it is lying on it's back in the cabin.
At the time this photo was taken, the masking and excess foam has been cut from the battens etc. and can be seen on the floor along with the overspray.
I have not seen a sprayfoam job before but Dave thought it was well executed and he's seen a few.
Inevitably some overspray ended up on the floor so I spent the evening and early next morning cleaning up the debris missed in the post job clean up by cosyhomes and made sure all scuppers were cleaned of debris. I also scraped along the sides and rear edge of each bilge compartment to ensure the free rearward flow of any water which could end up in the bilges in future. Particular attention was paid to the rearmost bilge compartments (ie in the engine room against the fuel tank and the stern) where water would collect and be pumped or sponged out from to ensure they had smooth clean surfaces. After this another coat of paint was added to cover any scraper scratches.
A link to the cosyhomes website is below:
http://www.cosyhomeuk.co.uk/
PS The van went out of the shed much more easily than it went in.
Subscribe to:
Posts (Atom)